My daughter’s second birthday is fast approaching, and between these last two birthdays I have noticed something: birthdays are not cheap. We decided this year to only have a small get together with family but that doesn’t mean we still can’t have fun! This piñata is easy to do and easier on your pockets!
First, you are going to want to gather your materials, most of which you might be able to find around your house! A balloon, flour, water, newspapers, and paint/tissue paper.
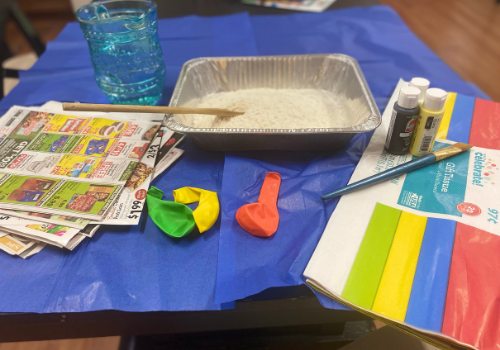
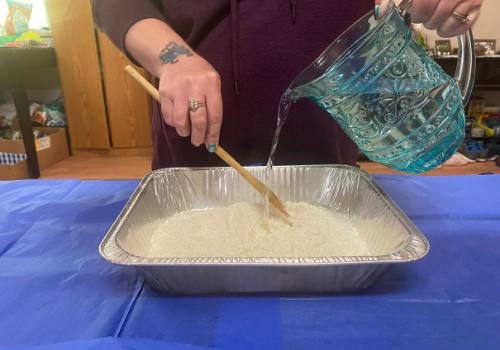
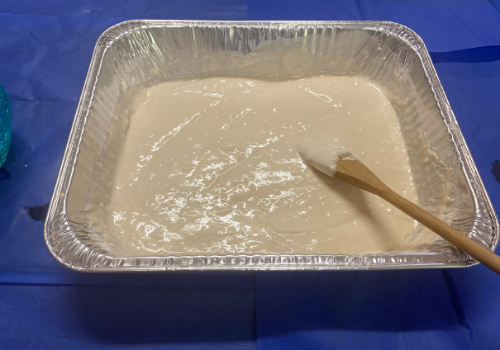
Next, mix the flour (we used about 4-6 cups) with a little water at a time until you have a ‘cake batter’ consistency. While this isn’t an exact science, you want to stay away from making the mixture too thin.
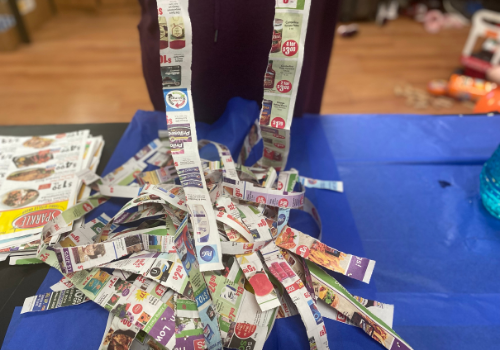
Then, you will need to shred your newspapers. We did about an inch thick.
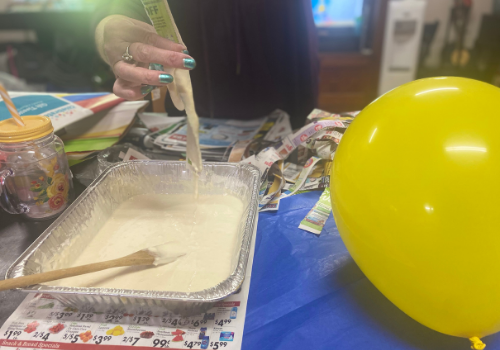
After you have your newspapers and your flour/water mixture you can start applying to the balloon. You will want to saturate the paper on both sides with the mixture and then take your pointer finger and thumb and swipe down the strip to get the excess off. After you have made sure the strip is covered you can apply it the already blown up balloon piece by piece.
Make sure your pieces overlap a bit so you don’t miss any spots. We put the balloon on a small bowl to avoid anything getting stuck on our workspace. You will want to leave a hole at the end of the balloon so you can fill the piñata with candy! (Don’t worry if you forget this step, you can always cut a small hole once the piñata is dry!)
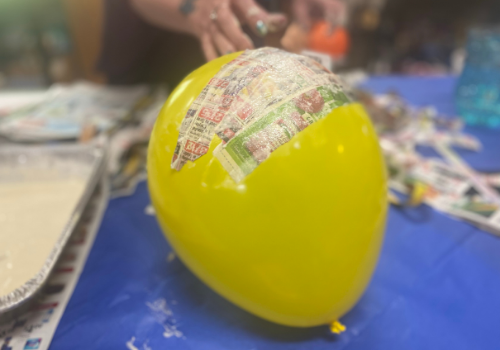
Once the first layer is applied you will want to apply the next layer right away. We laid the first layer horizontally and the second layer vertically for two reasons, first so you could see where you need to put the next layer and two, to give the piñata a stronger hold. You will want to put three to four layers on the balloon being careful to not apply too many layers (this will make the piñata hard to bust open) or too little layers (this could cause the piñata to not hold up).
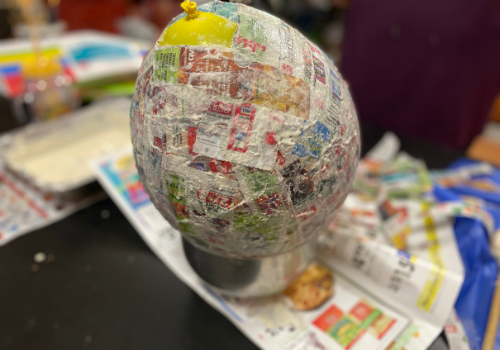
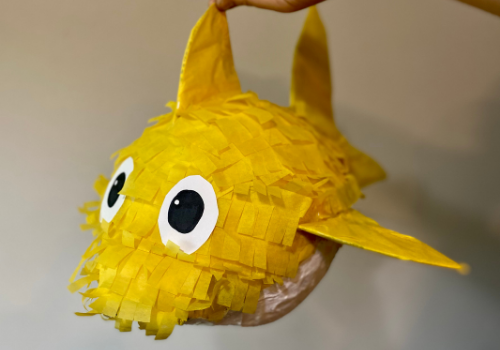
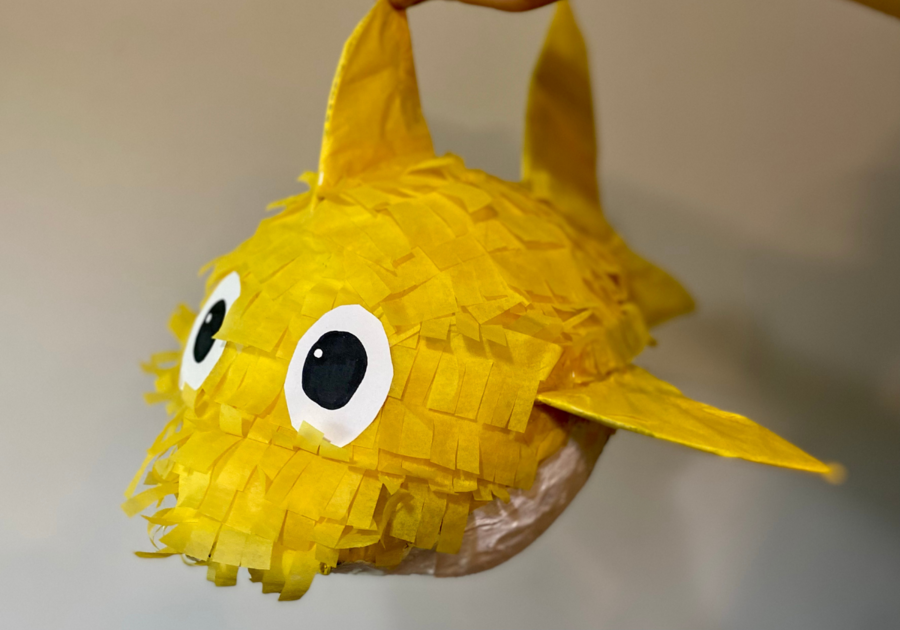
The drying process could take a few days so make sure you plan for that. Once the paper mache feels hard you can start decorating! We chose to dress our’s up as our favorite infantile shark but the possibilities are endless! We have also done a snowman, a coconut, and just a colorful ball!
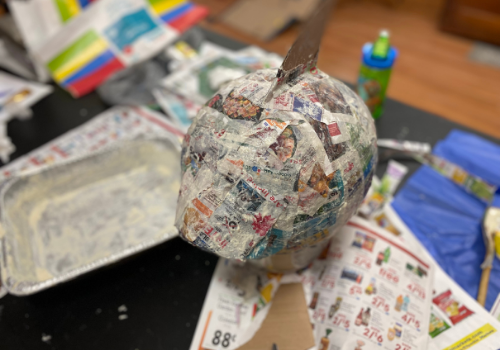
I added the top fin and secured it with paper mâché as it was drying but you can also use masking tape! I also used additional paper mache to form a nose for my shark.
Once the piñata is completely hardened you may pop the balloon and fill the hole with candy and small toys. After it’s filled, cover the hole with tape (the tape will be hidden when you decorate the piñata.)
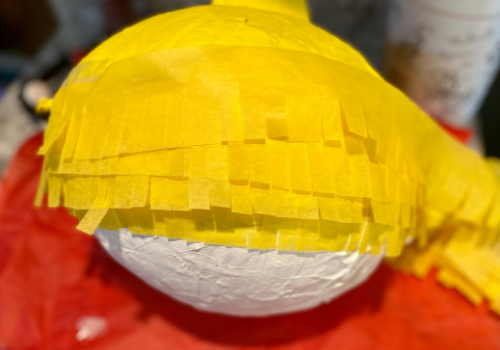
Next you can either paint or use tissue paper to decorate the outside of the piñata, I used both.
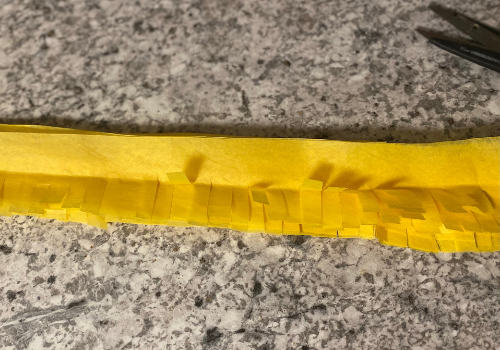
When doing the tissue paper I cut strips about 3/4” to 1” wide. Afterwards, I cut each strip about halfway up every quarter inch (as shown above). Once you are ready to lay the pieces you will just want to layer them all the way up. I applied the pieces with tape so I could easily move them if need be.
You can add any other embellishments or decoration you want, I added eyes, side fins and a tail. While it might not be perfect, my daughter recognized it as 'shark doo doo' (in her words), so I'll take it! Once you're done decorating, you have successfully created a piñata! Now the only issue you might have is letting your kids smash your work of art!